
If you are using Next.js 12, 13, 14, or above and want to integrate Google Analytics into your project, follow the simple setup guide mentioned in this article.
In the latest Next.js versions adding Google Analytics code has become simple and easy to set up. To get started you can copy and paste the code below into your layout.tsx or layout.js file, and replace G-XXXXXXXXXX with your Google Analytics tracking ID.
export default function RootLayout({
  children,
}: {
  children: React.ReactNode
}) {
  return (
    <html lang="en">
      <body>{children}

{/* Google Analytics START */}

          <Script
          id="GA4-url"
          strategy="beforeInteractive"
          src="https://www.googletagmanager.com/gtag/js?id=G-XXXXXXXXXX"
        ></Script>
        <Script
          id="google-analytics"
          strategy="afterInteractive"
          dangerouslySetInnerHTML={{
            __html: `
                window.dataLayer = window.dataLayer || [];
                function gtag(){dataLayer.push(arguments);}
                gtag('js', new Date());

                gtag('config', 'G-XXXXXXXXXX', {
                    page_path: window.location.pathname,
                });
                `,
          }}
        />
{/* Google Analytics END */}

</html>
  )
}
To learn more about how to obtain your Google Analytics Tracking ID and understand how the code works, continue reading this article. I will guide you through the entire process with simple, step-by-step instructions.
Also See: How to use Localstorage in Next.js 12 & 13 Above? 3 Method
1. How to Obtain Google Analytics Tracking ID
The first step is to create a Google Analytics account for your website to obtain a tracking ID.
If you already have a tracking code, you can skip this step. If you do not have a tracking ID, follow the steps mentioned below:
google analytics select account
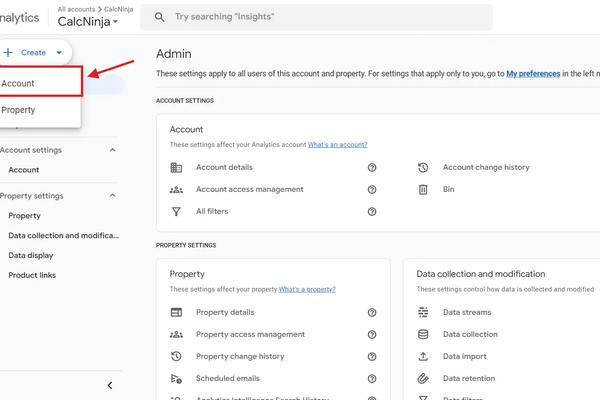
Navigate to the official Google Analytics website, sign in with your Google Account, and choose the Account option as displayed in the screenshot above.
google analytics add details
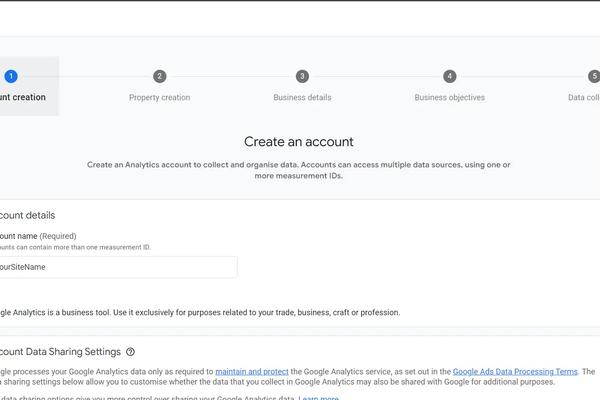
In the next screen, you have to submit all the details of your site such as Account name, Property Name, site URL, site category, and more.
select platform
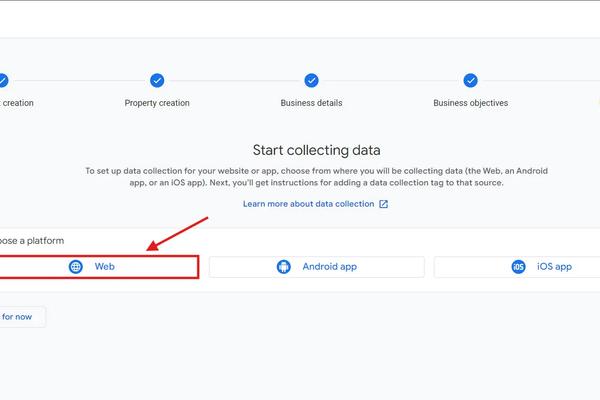
When you reach the “Data collection” section, you need to select the platform you want to use with Google Analytics, such as Web, Android App, or iOS App. Choose “Web” because we will be using it in Next.js.
enter site details
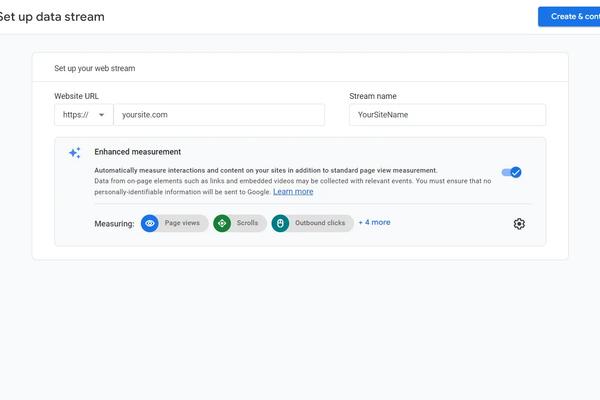
Now, enter the domain name of the site you want to track and set a name for that domain.
tracking id
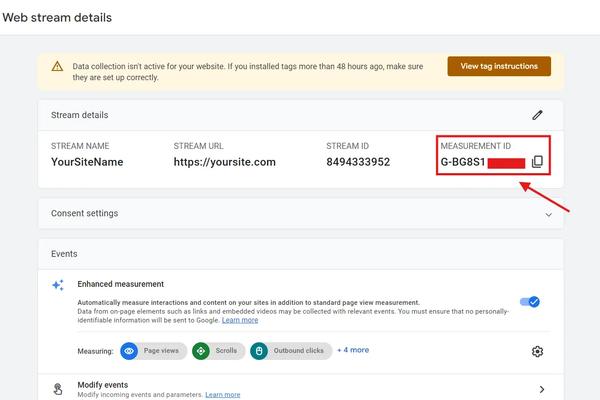
Copy the tracking ID and save it somewhere secure, as we will need it for our Next.js code.
2. Google Analytics Code
The next step is to add the Google Analytics code to your Next.js layout file.
However, if you try to copy and paste the Analytics code directly, you will encounter errors because Next.js does not support standard HTML tags and attributes.
To fix the errors we can use the dangerouslySetInnerHTML property to set all the codes, here is how to do that:
<Script src={`https://www.googletagmanager.com/gtag/js?id=G-XXXXXXXXXX`} />

<Script
               dangerouslySetInnerHTML={{
                __html: `
                window.dataLayer = window.dataLayer || [];
                function gtag(){dataLayer.push(arguments);}
                gtag('js', new Date());

                gtag('config', 'G-XXXXXXXXXX', {
                    page_path: window.location.pathname,
                });
                `,
        }}
      />
You can also see that I used the Script component provided by Next.js to optimize the performance of your application.
The Vercel team, who developed Next.js, also recommends using the Script component instead of the standard `<script>` tag.
3. Adding ID and Strategy Attributes
  <Script
        strategy="afterInteractive" //Add strategy
        id="GA-src" //Add id
        src={`https://www.googletagmanager.com/gtag/js?id=G-XXXXXXXXXX`}
      />
      <Script
       strategy="afterInteractive" //Add strategy
       id="google-analytics" //Add id
       dangerouslySetInnerHTML={{
          __html: `
                window.dataLayer = window.dataLayer || [];
                function gtag(){dataLayer.push(arguments);}
                gtag('js', new Date());

                gtag('config', 'G-XXXXXXXXXX', {
                    page_path: window.location.pathname,
                });
                `,
        }}
      />
In the Script component, you need to add two more attributes: id and strategy, to properly configure Google Analytics in Next.js.
ID: By assigning an id, you ensure the script block is included only once, preventing duplicate scripts and avoiding potential conflicts or redundant execution.
Strategy: The strategy attribute in the Script component controls when the script loads. afterInteractive ensures the script loads after the page is interactive, improving performance by not blocking page rendering.
4. Testing the Project
google analytics preview
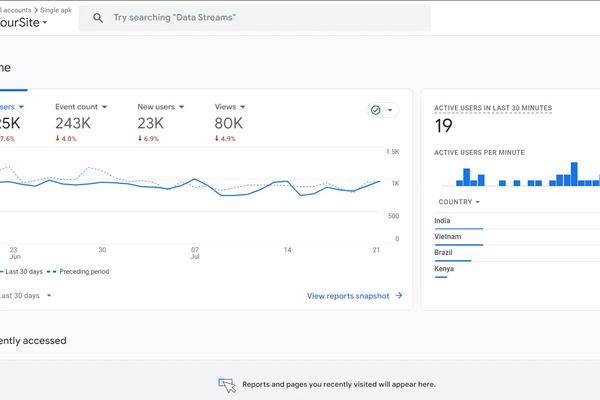
Go to the dashboard or home section of Google Analytics to see the number of users currently visiting your site. You can also access more detailed data in the Reports section.
Conclusion
Adding GA code to a Next.js project can be more complex compared to HTML and vanilla JavaScript, but by following the step-by-step guide in this article, you can easily integrate the tracking code.
Share this article with users who are looking for an easy method to add GA tracking code in Next.js.
Related Article: